A trip out yesterday brought with it the unmistakable twang af one of my spokes snapping as I dropped down a pothole- I didn't have anything with me to fix it so wrapped it out of the way. To fix a spoke you only need a couple of basic tools, a screwdriver, an adjustable spanner, a cassette tool and a spoke tool- most people have a spanner and a screwdriver in their toolbox, you can pick up a cassette and spoke tool for around £10 from somewhere like Halfords, well worth buying as you're bound to need them again. If the same thing happens to you this is how to sort it out when you get home...
First strip off the tyre and inner tube and you'll be left with a bear rim. If the broken spoke is on the non-drive side you can simply remove the broken spoke and (with a bit of gentle bending) put in a new one- if its on the other side its a bit trickier as the rear cassette is in the way. Check the rim where the hole for the spoke is to ensure that there's no obvious damage or wear, check the rim tape for wear and damage- replace as necessary.

If you are at home and you have the tools its easier just to take the cassette off- that way you'll be able to pass the new spoke through without bending it too much. Spokes can be bought in the right size quite cheaply from most cycle shops, idealy you should use new spokes- that said I tend to keep a few that i've recycled from other bike wheels.

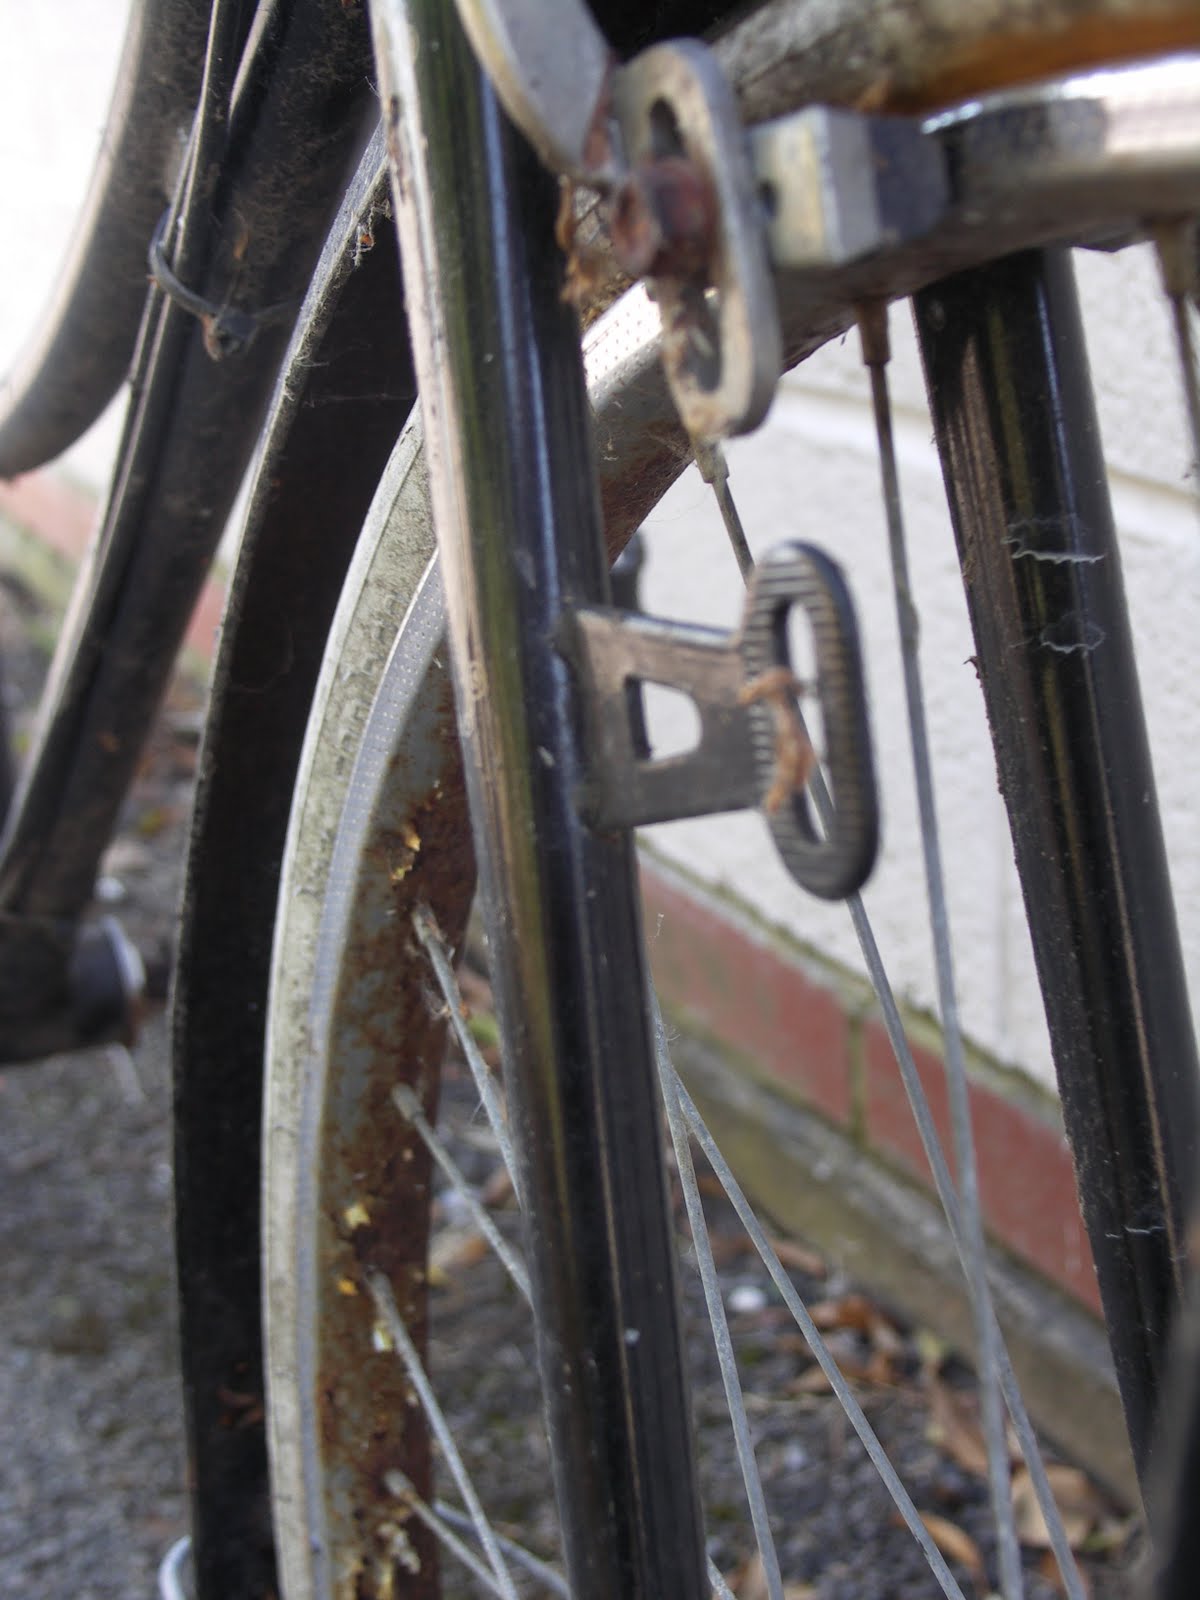
With the cassette removed it should look a bit like this. Post your spoke through making sure that it goes through on the correct side and follows the pattern of the removed spoke- if you're unsure look to the spokes either side of the one you're replacing

With the spoke back in place re-insert the spoke nipple and take up the slack in the spoke- the more you turn the nipple the tighter the spoke becomes- don't over tighten as it'll strip the threads on the spoke and make your wheel wobble

Now that you have your new spoke back in your wheel you'll need to tighten the spoke. Unless you are very lucky you'll find that (without doing this) when you spin your wheel where the spoke was removed you'll have a slight wobble- if you've reconnected your brakes you'll probably find that it'll catch against one side as it turns. You can do this with it back in the bike with the bike either on a stand or turned upside down.
In order to address your wobble gradually tighten the spoke nipple whilst slowly turning the wheel and looking from behind- you can also use the brakes as a guide. As you tighten the spoke the wobble should gradually reduce and your wheel will once again become 'true' or straight.
This is only the most basic of guides- if you'd like to learn a bit more visit Sheldon Brown for a fuller explanation. Replacing spokes takes a little practice but is far easier than you would imagine- next time you hear the 'twang' have a go at fixing it yourself.